Thursday, November 11, 2010

Easy Pesto


There once was a boy named LeGreg. Soon after he started dating his girlfriend, he met her mom and they discovered their mutual love of cooking and gardening. "I have to buy her this special basil plant! She'll love it!" he said. His girlfriend thought it charming that he wanted to buy her mother a gift, so she went along with it. The two of them raided every nursery in Chico to find this one variety of basil. Pesto basil, he says it's called. "It doesn't have that weird licorice taste that regular basil has and it makes really good...PESTO!". His girlfriend wasn't convinced that it was worth all the effort to find, but he insisted. And find, he did.

He gave my mom the little basil plant. It has light green leaves, with a creamy white trim. He certainly didn't need any additional points with her, but she loved the gift and planted it not in the herb garden, but right smack dab in the middle of the yard for all to see.

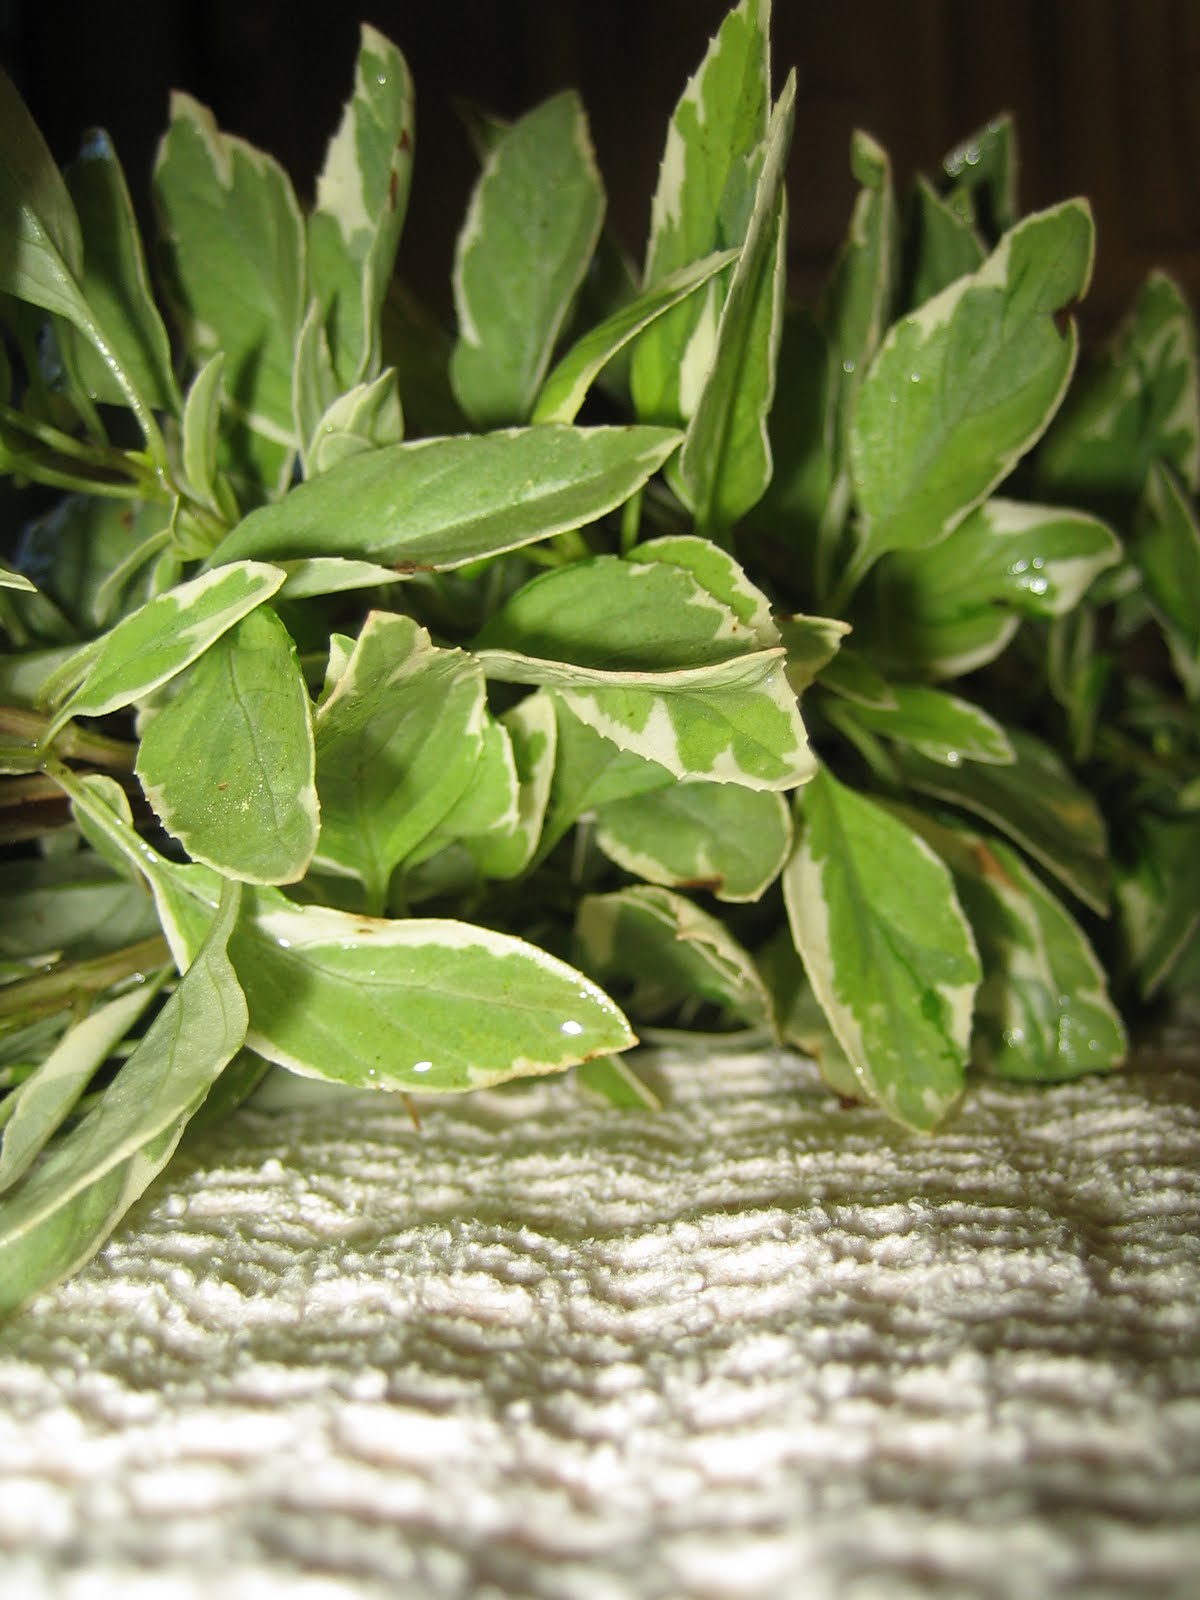
The plant likes her yard about as much as she likes him and grew to be a huge shrub (at the bottom of it in the pic, you can see a brick for size)! I couldn't let ALL that basil go to waste, so yesterday was the day that I was to make pesto for the first time everrrrrr. DUN DUN DUN!! I dug around and settled on this recipe.

Ingredients

  • 1/4 cup almonds
  • 3 cloves garlic
  • 1 1/2 cups fresh basil leaves
  • 1/2 cup olive oil
  • 1 pinch ground nutmeg
  • salt and pepper to taste

Directions

  1. Preheat oven to 450 degrees F (230 degrees C). Place almonds on a cookie sheet, and bake for 10 minutes, or until lightly toasted.
  2. In a food processor, combine toasted almonds, garlic, basil, olive oil, nutmeg, salt and pepper. Process until a coarse paste is formed.

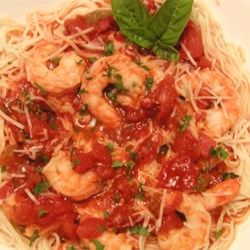
I doubled the recipe and it made about 1-1/2c of sauce, and I used a blender. My mom made her own version, the typical garlic/pine nuts/Parmesan cheese. MINE WAS TOTALLY BETTER!! Super good. The almonds gave it a nice nutty flavor (bonus: they're good for you!!). I haven't actually eaten it on anything yet, but the taste test was delish and I'm super stoked about it. Since I used a total of about 1/100th of that basil bush, I'll probably be making a ton more soon. Success!

Thursday, October 7, 2010

Sweet Potato Fries

People call yams sweet potatoes all the time and I find it annoying. Yams=orange. Sweet potatoes=yellow. Sweet potatoes=a super food packed with TONS of nutrients and good stuff. Yams=good, but not AS good.

I decided to make sweet potato fries with actual sweet potatoes.

I didn't really use a recipe sooo....yeah.

-Cut up 3 sweet potatoes

-Place on a foil covered cookie sheet (clean up is so much easier)

-Drizzle with olive oil

-sprinkle with a mixture of brown sugar, cinnamon, and ground cayenne pepper. I used approximately 1 Tbl brown sugar, 1/8 teas cinnamon, even less pepper.

Bake for 30-35 mins at 350 degrees.

I probably should have turned them halfway through. They were half really soft and half nice and crispy and carmalized-y.

Overall, though? Success!! And totally good for you.

Thursday, September 9, 2010

Baked Pears


The land on my boyfriends (aka his parents) property has TONS of fruit trees on it. In season right now? Pears. His mom seems to think that I eat nothing but, so I'm always sent home with a big plastic bag FULL of them. His dad mentioned, this last weekend, that I should try baking them. Hmmm...I'M GAME!! Sounds SO good, right?

Ingredients

  • 2 medium ripe pears, peeled and halved (I didn't peel them. I don't peel anything, pretty much. Peels usually have a lot of fiber)
  • 4 teaspoons butter or margarine
  • 1 teaspoon lemon juice
  • 2 teaspoons sugar
  • 1/4 teaspoon ground cinnamon
  • 4 teaspoons orange marmalade (meh. skipped it. The comments said that other jams were good, but I only have grape right now, and that didn't sound great)

Directions

  1. Place pear halves, cut side up, in a shallow 1-qt. baking dish (I put little foil place holder things under the skinny half of the pear, so that it wouldnt tip down. We cant be surrendering any butter by having it drip off the end, now can we?!). Place butter in the center of each; drizzle with lemon juice. Combine sugar and cinnamon; sprinkle over pears. Top with marmalade. Cover and bake at 350 degrees F for 15-20 minutes or until heated through (eh...I cooked mine for almost an hour).

Omg the SMELL. It smelled SO good!!I ate these with vanilla ice cream on top. Pre-ice cream, it's actually a pretty healthy dessert. I'll totally be making it again. Like, tomorrow.

Baked Lemon Chicken

I love lemon things!! So lemon chicken sounded pretty legit. And easy. LIKE ME!!! Just kidding.

Ingredients

  • 3 tablespoons butter, melted
  • 2 tablespoons lemon juice
  • 1 garlic clove, minced
  • 1/2 teaspoon salt
  • 1/4 teaspoon pepper
  • 1/2 cup seasoned bread crumbs (I used panko bread crumbs which, after tonight, I realize are probably actually huge bread crumbs. It would probably be better with a more finely ground bread crumb)
  • 4 (4 ounce) boneless, skinless chicken breast halves

Directions

  1. In a shallow dish, combine the butter, lemon juice, garlic, salt and pepper. Place bread crumbs in another dish. Dip chicken in butter mixture, then coat with crumbs.
  2. Place in a greased 13-in. x 9-in. x 2-in. baking dish. Drizzle with remaining butter mixture. Bake, uncovered, at 350 degrees F for 25-30 minutes or until juices run clear.(I went 30-35 mins, which was a bit too much)
Omg SO lemony!! Besides the bread crumbs being a bit too big, it was reeeeeally good. I ate it with cooked broccoli, asparagus (both from the frozen foods section of Trader Joe's), and cous cous. The advantage to cous cous is that, compared to the 30+ mins it takes to make rice or quinoa, it only takes like 5 mins to make. Win.

Lemon for life.

No pics. It just looked like breaded chicken. Pale breaded chicken, thanks to the huge white bread crumbs.

Wednesday, August 4, 2010

Turkey Albondigas in Broth

I've been craving soup. Not just eating it, but making it. Very bizarre, but whatever. I've been eyeballing this recipe in mah fave cookbook, Isabel's Cantina, since I got it. There's a pic in the book and it's looks all colorful and delicious and meatball-y. This cookbook has yet to let me down (link to the right). GO GET IT.

For meatballs:
8 oz ground turkey
1/2 med red onion, minced (wtf is the difference between minced and chopped?? Smaller? I have no idea)
2 garlic cloves, minced 2 Tbl finely chopped fresh mint
1 large egg, lightly beaten (oops, didnt read the beaten part. No harm done)
1/2 cup bread crumbs or panko
1 tsp salt (recipe says 'kosher salt'....yeeeeeah....)
1/2 cup all purpose flour
2 Tbl canola or peanut oil (I used oil, since I didnt have these)

For broth
2 Tbl olive oil
1 med yellow onion, diced
3 garlic cloves, minced

2 med carrots, diced

1 celery stalk, diced
1 cup dry white wine

3 Tbl tomato paste
1-2 chipotle chiles in adobo sauce, finely chopped (I used one, even scraped the seeds out, and it was definitely spicy enough. Good thing the can had like 15 in it. Pffffft)
6 cups chicken broth (I used low-sodium, and it was more than fine. I think regular would make it way too salty)
1 med zucchini

To make the meatballs, mix together the turkey, onion, garlic, mint, egg, bread crumbs, and salt in a medium bowl, using your hands. Form the mixture into small meatballs, about 1 inch in diameter. You should have about 12 meatballs. Roll the meatballs in the flour to coat. If not cooking them immediately, set the meatballs on a platter and cover with plastic wrap and refrigerate until ready to cook. This can be done up to 1 day in advance.

To make the broth, heat the olive oil in a medium heavy-bottomed pot over med-high heat. Add the onion and garlic and cook until the onion is soft and translucent, about 3 mins. Add the carrots and celery. Continue cooking for a few mins more, stirring well to coat the vegetables with the olive oil.

Add the white wine and simmer for 5 mins. Mix together the tomato paste and chipotle chiles and then stir into the vegetables in the pot. Add the chicken broth and simmer for 20 mins. Stir in the zucchini and cook for about 5 mins, or until tender.

While the broth is simmering, cook the meatballs. Heat the canola oil in a large saute pan (I used my electric skillet. Still not sure about that thing) over medium-high heat until hot but not smoking. Brown the meatballs in batches until cooked through, about 4 mins (ehhh....mine took more like 10 mins).

When all the meatballs have been browned, transfer them to the simmering broth and remove the pot from the heat.

Serve the soup steaming hot, topped with a sprinkling of chopped mint.

I was a little skeptical of the mint. Mint in meatballs/soup sounds...weird. Then again, I suck at using herbs, so they all sound weird to me. I WAS WRONG. Holy hell, those meatballs were SO good. The mint was great. The broth, like I mentioned about, was nice and spicy (white girl spicy), but bursting with flavor. The whole thing probably took me an hour or so. Not bad!!

Friday, April 30, 2010

Angel Hair Pasta with Shrimp and Basil

When my boyfriend gently suggested that I make dinner for him when he got into town, I laughed. He clearly isn't familiar with my culinary mishaps, despite warning him. Off to All Recipes, I go! As usually, I looked for something with few ingredients and high ratings. I found this, and decided that it looked good enough. Little risky making anything pasta-y for my Italian/Portuguese boyfriend who makes phenomenal pasta sauce buuuut....that was a risk I was willing to take.

Ingredients

  • 1/4 cup olive oil, divided
  • 1 (8 ounce) package angel hair pasta (aka capellini. apparently)
  • 1 teaspoon chopped garlic
  • 1 pound large shrimp - peeled and deveined (I used frozen. Worked!)
  • 2 (28 ounce) cans Italian-style diced tomatoes, drained (I bought 4-14.5 oz cans. It was a LOT, so I ended up using 3 and it was still a TON)
  • 1/2 cup dry white wine
  • 1/4 cup chopped parsley
  • 3 tablespoons chopped fresh basil
  • 3 tablespoons freshly grated Parmesan cheese

Directions

  1. Bring a large pot of water to a boil, and add 1 tablespoon oil. Cook pasta in boiling water until al dente. Place pasta in a colander, and give it a quick rinse with cold water.(angel hair cooks in like 2 mins, so next time, I think I'll do this last so that the pasta is still hot)
  2. Heat remaining olive oil in a 10 inch skillet over medium heat. Cook garlic, stirring constantly, until the garlic is tender, about 1 minute. Do not let the garlic burn. Add shrimp, and cook for 3 to 5 minutes (one of the reviews said that cooking the shrimp twice was too much, so I threw it it after all the sauce stuff and just let it cook in the sauce. Tasted a little 'shrimpy' and I made the mistake of adding the shrimp right at the beginning. I'll add it a few mins later next time, because I think it overcooked a little. Or I'll try following directions and sauteeing it and adding it very last to the sauce. We'll see). Remove shrimp from the skillet, and set aside.
  3. Stir tomatoes, wine, parsley, and basil into the skillet. Continue cooking, stirring occasionally, until liquid is reduced by half, 8 to 12 minutes. Add shrimp, and continue cooking until the shrimp are heated through, about 2 to 3 minutes. Serve the shrimp mixture over the pasta. Sprinkle with Parmesan cheese.
This was pretty easy! And it turned out really flavorful, so I was totally pleased. The boy approved, so I'll file it under success! As I mentioned before, the recipe makes a TON of sauce (I used a big frying pan and it was filled almost all the way up and I didn't even use all the tomatoes it called for). Oh! And this was my first time EVER making shrimp!! I was worried that I had overcooked it, but I think it was ok. It still kinda scares me. Well, that and it's a bit expensive for my taste to use regularly.

(The layout and links are all whackadoo in that first paragraph and Blogger hates me so I can't fix it. SORRY)

Thursday, April 8, 2010

Warm Spinach Salad

I freaking LOVE warm spinach salad. Spinach? Bacon? Eggs? Heck yes. I just wanted a super basic salad to serve with a turned-out-not-so-great-AT-ALL pasta dish, so I looked up recipes for the dressing and used this one. My salad just had spinach and hard boiled eggs (I put the bacon in the dressing), not all the other stuff in this recipe. Would probably be good, though, if you want to try it.

Dressing:

  • 1 tablespoon olive oil
  • 1 large shallot, minced
  • 1 teaspoon garlic, minced
  • 1/3 cup white wine vinegar
  • 1/3 cup Dijon mustard
  • 1/3 cup honey (I added extra honey, a couple tablespoons worth)
  • 2 strips crisply cooked bacon, crumbled (2 or 4 or 6...)
  • salt and pepper to taste

  1. Heat olive oil in a small skillet over medium heat. Stir in shallots and garlic, and cook until softened and translucent, about 2 minutes. Whisk in the vinegar, Dijon mustard, honey, and 2 crumbled strips of bacon; season to taste with salt and pepper, then cook until hot.
  2. Pour hot dressing over spinach and toss to coat.
I halved the recipe because there was only two of us, but kept the 2 strips of bacon (duh). It was quite vinegary/mustardy, so I added a tablespoon or so extra honey to cut that down a bit. Do a little taste test and play with it. The dressing turned out thicker than I remember most warm spinach salad dressings to be, BUT it tasted suuuuper good! Totally outshined the crapastic pasta that I made. Oops!

Thursday, March 18, 2010

Irish Breakfast


You know what happens when you mix Jameson and gingers, jello shots, green beer, and Irish car bombs? Not wanting to blog is what happens.

I shall persevere, however, because in the midst of drinking myself into a bumbling green mess, I made a traditional Irish breakfast that would make my ancestors rejoice and my arteries shudder. The only things missing were sausage (decided to just go with bacon. So. Much. Food) and the beans in tomato sauce. I went with pinto beans. California style. We got our breads and white pudding at John Campbells in SF. LEGIT place.

I fried up the bacon first, then fried everything else up in the bacon grease. Perhaps not exactly diet friendly, but it's SO GOOD. Made me want to go back to Ireland. Immediately. Like, now.


White pudding
Bacon
Eggs
Fried tomato
Scones
Potato bread
Soda bread

RAGING success!!

Tuesday, March 9, 2010

Lomo Saltado


Along with pisco sours, an almost daily staple during our time in Peru was lomo saltado. It's like THE dish down there. Uh...steak AND french fries?! ALL ROLLED INTO ONE?! Count my fat ass in! (not my pic. too lazy to take one)

Ingredients

  • 1 (16 ounce) package frozen French fries
  • vegetable oil as needed
  • 1 pound beef tri tip, sliced 1/8 to 1/4 inch thick
  • salt and pepper to taste
  • 1 large onion, sliced into strips
  • 3 large tomatoes, peeled, seeded, and sliced into strips (I didn't seed mine. Should have. They got kinda mushy)
  • 1 yellow chili pepper (preferably Peruvian aji amarillo)(have yet to see one of THOSE stateside. I bought a 'yellow chili pepper'. Close enough, right? It was super mild, though. My Peruvian sister in law bought the closest thing she could find when she made it for us, being unfamiliar with gringo peppers, and picked up a habenero. DO NOT DO THIS. You will cry fire.)
  • 1/4 cup distilled white vinegar
  • 1 dash soy sauce to taste
  • 2 tablespoons chopped fresh parsley

Directions

  1. Prepare the bag of French fries according to package directions.
  2. While the French fries are cooking, heat the oil in a frying pan over medium-high heat. Season the sliced meat with salt and pepper to taste. Fry the meat until just cooked, and the juices begin to release. Remove the meat from the frying pan, then cook the onions, with additional oil if needed, until they are transparent. Stir in the tomato and aji amarillo; cook until the tomato softens. Pour in the vinegar and soy sauce, add the French fries, cover, and cook until the beef is done, about 3 minutes. Season to taste with salt and pepper, and sprinkle with chopped parsley to serve.


TADA!!!!! Total success. Wasn't as good as is was in Peru (duh), but totally tasty.

Sunday, February 14, 2010

Raspberry Banana Bread

The thought of eating bananas always sounds great. They're sweet! They have potassium! Yay! So I buy them. Then they turn brown and die because it just seems like a really big commitment to eat a whole banana. You know? So, this morning I had 3 "ripe" bananas. Solution? Banana bread. Duh. I found this recipe and decided to give it a go.

Ingredients

  • 1 3/4 cups all-purpose flour
  • 1 1/2 cups sugar
  • 1 teaspoon baking soda
  • 1 teaspoon salt
  • 2 eggs
  • 1 cup mashed ripe bananas
  • 1/2 cup vegetable oil
  • 1/3 cup water
  • 1 cup fresh or frozen unsweetened raspberries* (STUPID expensive right now, so I got frozen blackberries. Totally worked)
  • 1/2 cup chopped walnuts (blech. Do not want. If you do, go for it. I won't judge. Or make jokes about how you like nuts)
In a large bowl, combine the flour, sugar, baking soda and salt. In another bowl, combine the eggs, bananas, oil and water. Stir into the dry ingredients just until moistened. Fold in raspberries and walnuts. Pour into two greased 8-in. x 4-in. x 2-in. loaf pans (I sprinkled a little brown sugar on top for a crusty sweet topping. Oh AND, I don't have loaf pans, so I used my glass 9x9. Worked fine). Bake at 350 degrees F for 55-65 minutes or until a toothpick comes out clean. Cool for 10 minutes before removing from pans to wire racks.

Final result: SUCCESSSSS!!! Super good. Warm it up (aka eat half of it while it's still warm from the oven) slather some butter on it and your mouth with thank you.

ps-Look at me substituting ingredients and not totally ruining the whole thing!!!! Ok, subbing blackberries for raspberries isn't exactly daring, but STILL.

Thursday, February 4, 2010

Pisco Sour


When I went to Peru for my brother's wedding to his Peruvian princess, one of my favorite things was Pisco Sours. Pisco is Peru's national booze. Sweet! When they recently brought me back a bottle, I was determined to make them myself.

2oz Pisco Brandy
1oz lime juice
1/4 oz simple syrup
1/2 egg white
dash of bitters

Throw all but the bitters in a shaker and shake the snot out of it. The egg white's froth up and make a rad foam, which you sprinkle a couple drops of bitter on. I think if I had stuck all the liquid in a blender, it probably would have frothed up better (like in that pic, which was taken in Peru). Obvious you-might-die warning: RAW EGG WHITES. Basically, you're taking your chances. Risky risky!!

Thursday, January 21, 2010

Meat is Tasty Murder

I did it!!! I MADE STEAK!!! So, I'm suuuuuper good at eating meat, but I have yet to fully hone my skills at actually cooking it. With my workouts leaving me bruise riddled lately, I'm wondering if I need to up the iron intake, so steak plopped itself on my menu. The BEST source of iron is red meat. Veggies and supplements don't even come close to comparing. Sorry, vegetarians.

So I hit up the meat aisle and grabbed a pack of steaks. I can't remember which cut I got. They all look the same to me. It's pretty much "eeny meeny miny THAT ONE!". Now. My dad makes a killer tri-tip. It's like bloody heaven. His trick? Fagundes meat seasoning. Apparently Santa is a fan as well, as bottles of this stuff found it's way into our stockings one year.

I got home, sprinkled the seasoning on each side of the meat and let it sit for a half hour or so. Not sure if seasoning needs to "sink in", but it sounded good, right? I fired up my electric skillet to see if I could find another use for it. I had it on med-high, and cooked the meat on each side basically until I couldn't see any red from the outside anymore (5-ish mins on each side, maybe?). Not quite sure what the protocol is for that. I served it with some quinoa and fire roasted veggies (frozen isle at Trader Joe's. Comes with a 'balsamic glaze' that tastes like it's own heaven).

Verdict: SUCCESS!!! It was perfectly pink on the inside and, as usual, the seasoning made it taste like granted wishes.

Saturday, January 9, 2010

Product Review: Soy Creamer by Trader Joe's

A lot of the things that I eat/use, I don't necessarily cook, but I still wanna tell you about them! So, this whole lactose intolerance thing. Still here. Still blows. With my coffee, I could totally go without sugar, but I can NOT go without creamer. I hate milk in it. I hate anything except half and half. And soy milk? ICK. I don't really like the flavor, and it's far from creamy enough for my liking in my coffee. Enter stage right: Trader Joe's Soy Creamer. Omg, people. #1-it doesn't taste super soy-y at all, but it does have a tiny hint of a nutty flavor. #2-totally creamy!!! WIN! I loooove it. In fact, I told my sister about it and she uses it now, too, and she's not even lactose intolerant (yet). Bonus: it's like $2!


Monday, January 4, 2010

Swiss Chard


Wanna impress someone? Tell them you know what the hell to do with chard. Or maybe I'm just impressed by it. I mean, it's a green other than lettuce, so it sounds all fancy to me. Anyhoo, this is a little side dish made with chard. As far as I can tell, there is no difference in taste between the different colors of chard. It usually comes in red, green, or rainbow. I usually get rainbow, just because it's purdy! If you get it at the farmer's market, wash it well. This last batch I made was a wee bit gritty because I'm totally lazy and just rinsed it quickly. I have no idea where I got this recipe. Off the interwebs a long time ago...in a land far away...

-2Tbl butter
-2Tbl olive oil
-1Tbl garlic
-1/2 red onion
-Two bunches of chard (they vary in sizes. Some have huuuuuuge leaves, some have tiny stems. Yay for variety! Basically-just chill. Don't worry about it)
-1 cup white wine
-1 Tbl lemon juice
-2Tbl parmesean cheese

First off-the chard leaves should be cut up separately from the stems. The stems are usually pretty thick, so they take longer to cook. If the stem goes up pretty far into the leaf, just cut it out. Cut the leaves into about 2 inch chunks (totally up to you how big you want the pieces. It'll cook down in size a lot).

Heat up the butter and olive oil in a pan over med (or med-high. Crap, I don't know!). When melted, add in the garlic and onion and sautee until soft. Next, add the white wine and the stems of the chard and cook until the stems are soft. Add the leave and cook just until they're wilted.

Drizzle the lemon juice on top, and sprinkle some cheese on it.

And now you can totally rock the farmer's market and be all "what, that? Oh that's just swiss chard. I've totally made that before. Be jealous, bitches".

Sunday, January 3, 2010

Electic Skillet Cooking-chicken, veggies

I got a 12-in electric skillet for Christmas. Truth be told, I don't know what the hell to do with it. I mean, I just don't get what I can do with it that I can't do with a regular pan on the stove. Yet more proof for the title my blog. Since my mother was SO excited to give it to me, I certainly couldn't take it back, so it was time to put it to the test.

Also-I feel like I need to start eating 'cleaner'. I owe it to my body. I recently figured out that I have some sort of acute lactose intolerance, which blows, but I think I need to take it even further. I'll be trying to load the veggies into every meal, eat leaner meats (mostly chicken), and limited the gluten. Back to good 'ol quinoa!

Ok, so I started with making some quinoa (in a regular pot). The usual: 1 part quinoa, 2 parts chicken stock or water (I used half low sodium stock, half water, but it came out a little bland).


4pcs chicken tender-sized chicken breasts
4 bok choy
4 broccoli


I put the electric skillet on low-medium, threw in some "buttery spread" (ugh. I miss butter) and 3 cloves of sliced garlic. Let the garlic get nice and soft/light brown. Then I threw in 4 bok choys (pieces of bok choy?) and 4 stalks of broccoli, stems and all. I put some low sodium broth and white in, enough to cover the bottom of the skillet, and let it simmer. I covered it, so it would steam the veggies. Make sure to flip them every once in a while. When both types of veggies were soft enough for a fork to easily go through, I took them out and put the chicken in. There should still be some 'juices' left in the pan to cook the chicken in.

Cook for a few mins on each side, making sure it's cooked all the way through. Throw it all together and you've got yourself a pretty damn healthy meal! Mine came out a little bland. I always feel like regular broth is too salty, and low sodium isn't salty enough. And I totally suck at seasoning stuff!! I'll have to work on all that...

I'm still not totally convinced that I couldn't just do all that in a pan on the stove, but the skillet worked well enough. Moms told me that it would be good to make stuff with 'sauces' in, so I'll have to try that next.