Showing posts with label dessert. Show all posts

Monday, October 14, 2013

milk chocolate mousse with coconut whipped cream.

Holy crap, I am SO far behind on this blog!!

This recipe is from How Sweet Eats.

It is DELICIOUS. It's crammed full of coconut, though, so not exactly a good diet dessert. I almost found the coconut in the mousse AND the coconut in the whipped cream to be a little over the top. I think next time I would put regular whipped cream on it, but I would fo sho put the coconut whipped cream on something else.

ingredients:
2 tablespoons unsalted butter
2 tablespoons water
1 tablespoons sugar
2 tablespoons water
1 tablespoon powdered sugar
directions:

8 ounces high-quality milk chocolate, chopped
2 large egg yolks
2 cans full-fat coconut milk, cold (refrigerated overnight)
Combine chocolate, water and butter in a microwave safe bowl. Microwave on medium heat for 30 seconds, stir, then microwave for 30 seconds again. Stir constantly until all chocolate is melted and the mixture is smooth. Set aside to cool for 10 minutes.
While the chocolate is cooling, take one can of coconut milk out of the fridge. Open the can and discard the liquid, then scoop the firm coconut meat into the bowl of your electric mixer. Beat on medium-high speed until completely whipped and thick. Set the bowl in the fridge.
Add egg yolks, sugar and remaining water to a saucepan over medium heat. Whisk constantly until sugar is dissolved, mixture is opaque and light yellow and has thickened and can coat the back of a spoon. Remove from heat and stir in melted chocolate mixture. Place saucepan in a bowl of ice water and whisk constantly until chocolate is cooled.
Remove whipped cream from the fridge and fold it into the chocolate mixture. Once whipped cream is completely folded in, evenly pour mousse into either two or four glasses. Refrigerate for 4 hours.
A few minutes before serving, remove the other can of coconut milk from the fridge and whip the cream just as you did earlier. Once whipped, add in powdered sugar and beat just until the sugar is incorporated. Top mousse with the whipped cream and extra chocolate shavings if desired.
[adapted from taste of home]

Tuesday, June 4, 2013

Milk Chocolate Mousse with Coconut Whipped Cream

Aaaaaand my love affair with How Sweet Eats continues.

Note: the coconut whipped cream was pretty damn good, BUT the coconut on coconut (it's in the pudding, too) was a LITTLE rich. I think I would do regular whipped cream next time, and slap the coconut whipped cream on a bunch of other stuff.

But, really?

This was phenomenal.

I did so many taste tests through the process that I was pretty sure I would have none left by the time it was done.

ingredients:

8 ounces high-quality milk chocolate, chopped
2 tablespoons unsalted butter
2 tablespoons water
2 large egg yolks
1 tablespoons sugar
2 tablespoons water
2 cans full-fat coconut milk, cold (refrigerated overnight)
1 tablespoon powdered sugar

directions:

Combine chocolate, water and butter in a microwave safe bowl. Microwave on medium heat for 30 seconds, stir, then microwave for 30 seconds again. Stir constantly until all chocolate is melted and the mixture is smooth. Set aside to cool for 10 minutes.
While the chocolate is cooling, take one can of coconut milk out of the fridge. Open the can and discard the liquid, then scoop the firm coconut meat into the bowl of your electric mixer. Beat on medium-high speed until completely whipped and thick. Set the bowl in the fridge.
Add egg yolks, sugar and remaining water to a saucepan over medium heat. Whisk constantly until sugar is dissolved, mixture is opaque and light yellow and has thickened and can coat the back of a spoon. Remove from heat and stir in melted chocolate mixture. Place saucepan in a bowl of ice water and whisk constantly until chocolate is cooled.
Remove whipped cream from the fridge and fold it into the chocolate mixture. Once whipped cream is completely folded in, evenly pour mousse into either two or four glasses. Refrigerate for 4 hours.
A few minutes before serving, remove the other can of coconut milk from the fridge and whip the cream just as you did earlier. Once whipped, add in powdered sugar and beat just until the sugar is incorporated. Top mousse with the whipped cream and extra chocolate shavings if desired.

Saturday, January 26, 2013

Chocolate Chip Cookie In A Cup

Recipe from No. 2 Pencil

The other night, we were sitting around, craving something sweet. I came across this recipe, and thought it would be perfect. ONE serving of chocolate chip cookie! Made in the microwave!

Ok, it was more like a spongy cake than a cookie, but I had all the ingredients on hand and it did the job. 

1 Tablespoon Butter
1 Tablespoon Granulated White Sugar
1 Tablespoon of firmly packed Dark Brown Sugar
3 Drops of Vanilla Extract
Small Pinch of Kosher Salt
1 Egg Yolk (discard the egg white)
Scant 1/4 of All Purpose Flour
2 Tablespoons of Semi Sweet Chocolate Chips

Start by melting your butter in the microwave. Add sugars, vanilla and salt. Stir to combine. Separate your egg and add the yolk only to your cup. Stir to combine. Add flour, then stir again. Add the chocolate chips, and give a final stir. Cook in microwave 40-60 seconds, start checking for doneness at 40 seconds. Mine takes 50 seconds. 

Serve warm.

Tuesday, January 1, 2013

Easy Cranberry Souffle

This was the other side I brought for Christmas.

Recipe and picture from My Life as a Mrs.


ingredients:

For the Cranberries:
3 cups fresh cranberries (12 ounce bag)
3/4 cup sugar
3/4 cup chopped walnuts (or pecans)
For the Topping:
3/4 cup melted butter (1 1/2 sticks)
3/4 cup sugar
3/4 cup flour
2 eggs, beaten

directions:

For the Cranberries:
Preheat oven to 325ºF. Spray a 1 1/2 quart casserole dish with non-stick cooking spray. Wash cranberries and pick out any rotten ones. Place into prepared baking dish. Mix together the sugar and walnuts and sprinkle over the top of the cranberries. Gently shake dish to help spread out the sugar mixture.
For the Topping:
Mix together butter, sugar, flour, and eggs in a bowl and spread mixture evenly on top of cranberry mixture. Bake in preheated oven for 45 minutes, or until golden brown.
Ok, so I only have one square dish, and it was used for the sweet potatoes. I used one of those rectangle, tall casserole dishes, which I think sort of messed up the topping. It was still delicious, but there was equal parts topping to cranberry, which was just....a lot. As the originator mentions in the recipe, though, toss a scoop of vanilla ice cream on top of this "side" dish, and it makes a killer dessert, too. I will definitely make this again....in the correct dish. 

Friday, August 24, 2012

Almond Butter Chocolate Chip Cookies (Gluten-free, if you wanna)

I first heard about these cookies on How Sweet It Is, but they're actually from Eat Live Run. When I first looked at the recipe, I was SHOCKED. I had almost everything on that list. Except regular sugar. I know it's weird, but I have zero sugar in my house. Don't judge me.

While looking at stuff to register I told LeGreg, "Well, we obviously have to register for a KitchenAid mixer. Every house needs one of those." To which he appropriately responded, "why do you need one of those? You never even bake!". What a dick, right?

So, I saw this recipe and was all "WATCH ME BAKE! I TOTALLY NEED THAT MIXER BECAUSE I BAKE SO MUCH!"

The fact that this recipe is so easy that you can use a spoon to mix it and I didn't even have to use my hand mixer is NOT THE POINT, PEOPLE.

I'm a baker, now.

That's the point.

Duh.

(Warning: this makes ELEVENTY MILLION cookies)


Ingredients:
1/4 cup coconut oil, room temperature
3/4 cup granulated sugar
3/4 cup brown sugar
1 1/4 tsp baking soda
1/2 tsp cinnamon
3/4 tsp salt
3 cups gluten-free oats (or old fashioned) (I used old fashioned. Or whatever the oatmeal is in my cupboard)
1 10-oz bag dark chocolate chips
1 cup almond butter
2 tbsp ground flax mixed with 6 tbsp warm water
2 tsp vanilla extract
Directions:
Preheat oven to 350 degrees.
Cream together the coconut oil, almond butter, granulated sugar and brown sugar until well blended. Add vanilla extract and ground flax + water water mixture. Keep beating until everything is combined.
In another bowl, mix together the oats, baking soda, salt and cinnamon. Add to wet ingredients along with chocolate chips. Mix until just combined—be careful not to overmix!
Roll small balls of dough and place three inches apart on a silpat or parchment paper-lined sheet tray. Do not flatten dough balls. Bake for 10-12 minutes until puffy. Let cool for 5 minutes on sheet tray before transferring to cooling rack to cool completely.

First off, I definitely completely forgot the vanilla, and I'm not sure it was missed. Not that I have anything to compare this to, but whatever.

Second off, almond butter is like semi-liquid gold. A cup of it is A LOT. I might have cried a little as I put the almost empty jar that I had just opened that morning back into the fridge. 
They WAY flattened out while they baked, so I used pretty tiny balls of dough. They look crunchy, but they're actually pretty chewy. AND DELICIOUS. 
But a little oily. Between the coconut oil and the almond butter, which is pretty oily itself, they're just a little....oily. I might try to remedy that next time, but I have no idea how yet. 
BUT I'M TOTALLY A BAKER NOW.  So I'm sure I'll expertly figure it out. 
Things REAL bakers do? Forget to buy chocolate chips and use a dark chocolate bar that they find in the back of the freezer (because ugh, you can't binge eat dark chocolate, so why bother?) and chop it up to MAKE chocolate chips. 
Baker. 
Boom.

Monday, July 2, 2012

Lemon Crinkle Cookies

It's an odd thing, spying a treat on Pinterest and then going to actually make it and finding yourself square in the middle of a religious website. The Mormon's lemon cookie game is on point, y'all. Not gonna lie.


Lemon Crinkle Cookies
Makes 2-3 dozen

Ingredients:
½ cups butter, softened
1 cup granulated sugar
½ teaspoons vanilla extract
1 whole egg
1 teaspoon lemon zest
1 Tablespoon fresh lemon juice
¼ teaspoons salt
¼ teaspoons baking powder
⅛ teaspoons baking soda
1-½ cup all-purpose flour
½ cups powdered sugar


Directions:
Preheat oven to 350 degrees. Grease light colored baking sheets with non-stick cooking spray and set aside.

In a large bowl, cream butter and sugar together until light and fluffy. Whip in vanilla, egg, lemon zest, and juice. Scrape sides and mix again. Stir in all dry ingredients slowly until just combined, excluding the powdered sugar. Scrape sides of bowl and mix again briefly. Pour powdered sugar onto a large plate. Roll a heaping teaspoon of dough into a ball and roll in powdered sugar. Place on baking sheet and repeat with remaining dough.

Bake for 9-11 minutes or until bottoms begin to barely brown and cookies look matte {not melty or shiny}. Remove from oven and cool cookies about 3 minutes before transferring to cooling rack.

*If using a non-stick darker baking tray, reduce baking time by about 2 minutes.


I changed exactly nothing in the recipe. These were so light and perfectly sweet and lemony. They came together pretty quickly, too. I used a cookie dough scooper thingy, which sped the process up a bit.


These are a keeper, fo sho. 

Monday, June 18, 2012

Key Lime Pie

A while back, a coworker came in and said, "Hey! I made a key lime pie! Want some?"

Duh.

This dudes key lime pie was jaw dropping. The crust was chewy and buttery, the filling was tangy and sweet. It was just....one of the best things I think I've ever had. And I've had a lot of food.

He gave me the recipe, and it sat in my inbox for probably close to a year. Intimidating.

Yesterday was the day. I was going to make my dad a key lime pie for Father's Day.

When I glanced over the recipe, it actually didn't even look that hard! We all know how that can go, though...


Total Ingredients
Graham Cracker Crust
1 ¼ cup
Graham Cracker Crumbs (or 1 individual package from a box)
2 T
Granulated Sugar
5 – 6 T
Unsalted Butter (I used 6T)

Pie Filling
3
Large Egg Yolks (Room Temperature)
14 oz
Sweetened Condensed Milk
½ cup
Key Lime Juice
2 tsp.
Key Lime Zest (grated)

Cream Topping
1 cup
Cold Heavy Whipping Cream (35-40% butterfat content)
2 T
Granulated Sugar (or ¼ cup if you like a bit sweeter)

Directions:

  1. Preheat oven to 350˚ F
  2. Place oven rack in the center of oven.
  3. Butter or lightly spray with non stick vegetable spray, a 9 inch pie or tart pan.
Graham Cracker Crust
  1. Mix together the graham cracker crumbs (I put them in a ziploc and used a rolling pin to crush them), sugar and melted butter.
  2. Press onto the bottom and up the sides of a prepared pan.
  3. Bake for about 10-12 minutes or until set and lightly browned.
  4. Remove from oven and place on wire rack to cool while you make the filling.
Filling
  1. In the bowl of your electric mixer, with the whisk attachment beat the egg yolks until pale and fluffy (2-3 minutes).
  2. Scrap down the sides of the bowl and then beat in the lime juice and zest (I assume you also put the sweetened condensed milk in at this point).
  3. Pour the filling over the crust and bake for about 10 – 15 minutes, or until the filling is set.
  4. Remove from oven and place on a wire rack to cool.
  5. Once it is completely cooled, cover and refrigerate for several hours or overnight.
  6. Once the filing has chilled, in the bowl of your electric mixer, with the whisk attachment (or with a hand mixer), beat the whipping cream and sugar until stiff peaks form.
  7. Either pipe (using Wilton 1M star tip) of place mounds of whipping cream on top of the filling.
  8. Can be store in the refrigerator for a few days (leftovers? LOL, yeah right).
 
Makes 1 – 9 inch (23 cm) pie or tart.


I didn't really have time to let the pie cool and THEN chill it in the fridge, so I tossed it in the fridge straight away for a few hours. No harm done. 

He sweetens his whipped cream, but my mom made ours and didn't. It's phenomenal, either way. 

This pie was totally easy! Ok, juicing those tiny little key limes was a pain in the ass, but other than THAT, it was easy. The tart and sweet and buttery combo is to die for. 

Tuesday, May 29, 2012

Pretzel Buttons

LeGreg's mom threw his brother an engagement party this weekend with a "sweet and salty" theme. I knew that I wanted to contribute, so I took to Pinterest to hunt down a little something to make. Pinterest never fails. 


I found these pretzel buttons and knew it was meant to be. What was NOT meant to be was easily finding those shaped pretzels AND the Hugs. Took a damn man hunt! In the end, though, it worked out. Other than taking the time to unwrap a million Hugs and sort out the colors of M&Ms, they were totally easy to make. I love that you can easily customize the colors. I went with green and yellow for their favorite baseball team, the A's. I made a couple with Rolos, from another baking project. They tasted good, but the caramel didn't melt down at all, so they didn't look as cute and squishy. 


 What you'll need:
  • square pretzels
  • Hershey's Hugs . You can use Kisses, too, but I think the Hugs taste better and they definitely soften up better!
  • plain M&Ms

Directions:
Preheat oven to 200°.  If your oven runs hot you may want to turn the temp down to 170°. (I did 200)

Line a cookie sheet with parchment paper or Silpat.  Place the pretzels on and top them with the hugs. 

Bake for 4-5 minutes until the chocolate is shiny and soft, but NOT melting - they should still hold their shape. (I did 4.5 mins. They looked shiny and soft, but started getting a little melty after I took them out. Tread with caution!)  

Carefully place an M&M in the center of each hug and press it down to spread the chocolate (you definitely want to press them and not just set them on top. Pressing helps shape it and keep the M&M in place. The one that I just sorta set on top ended up sliding to the side, so it had to be disposed of. In my mouth.).  

Allow to cool completely, a few minutes in the fridge works perfectly, and enjoy!


They were a huge hit! Cute and tasty and pretty impressive looking, if I say so myself. 

Monday, January 23, 2012

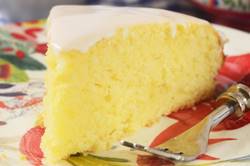
Lemon Frosted Lemon Cake

My BFF came into town for her 30th birthday, so I wanted to do something special and unexpected. \


Bake a cake. 


Bake a LEMON cake, because she loves lemony things.  


1 cup (230 grams) unsaltedbutter, room temperature
1 cup (200 grams) granulated whitesugar
1 teaspoon purevanillaextract
4 largeeggs, room temperature
Zest of 1 largelemon(outer yellow skin of lemon)
2 cups (260 grams) all purposeflour
2 teaspoonsbaking powder
1/4 teaspoon salt
1/4 cup (60 ml) fresh lemon juice

Lemon Frosting:
1 cup (115 grams) confectioners' (powdered or icing) sugar, sifted
2 - 4 tablespoons fresh lemon juice

Lemon Cake: Preheat oven to 350 degrees F (180 degrees C) and place ovenrack in the center of the oven. Butter, or spray with a non stick cooking spray, a 9 inch (23 cm) spring form pan and then line the bottom of the pan with parchment or wax paper.

In the bowl of your electric mixer (or with a hand mixer) beat the butter and sugar until light and fluffy and pale in color (about 3-4 minutes). Scrape down the sides and bottom of the bowl as needed. Beat in the vanilla extract. Add the eggs, one at a time, mixing well after each addition (batter will look curdled).

Sift or whisk together the flour, baking powder, salt, and lemon zest. Add the flour mixture (in three additions) alternately with the lemon juice (in two additions), mixing until you have a smooth batter. 

Pour the batter into the prepared pan, smoothing the top with the back of a spoon or an offset spatula. Bake about 40 - 50 minutes, or until a toothpick inserted in the center comes out clean. (Do not over bake or the cake will be dry.) Place on a wire rack to cool for about 15 minutes, then gently remove the sides and bottom of the pan.

Lemon Frosting:Place the sifted confectioners sugar in a small bowl. Add 2 tablespoons lemon juice and stir until you have a thick and smooth glaze. Add more lemon juice or powdered sugar, as needed. Pour the frosting over the top of the cake, allowing it to drip down the sides. Let the frosting dry before covering and storing. This cake will keep for several days in anairtightcontainer.
Makes one - 9 inch (23 cm) cake.

First off, all of those links and that pic were with the original recipe. They aren't mine, so I can't be held accountable if it's porn or something. The picture is because mine didn't come out NEARLY that pretty. 


Turns out, I only had access to a 6-in pan, aaaaaand I didn't hear the timer go off, so it was a smidge overcooked and dry. My glaze also looked nothing like that. Mine was clear, BUT it tasted like a dream come true. I think they maybe used more powdered sugar? 


Baking makes me nervous, because there is so little room for error. This cake was pretty easy to assemble, though. I should have paid more attention to the "smoothing the top" part, though, as mine was a little domed and a lot not flat. Meh. Still tasted like cake, so no huge loss. 

Definitely worth making again, fo sho. 

Thursday, January 5, 2012

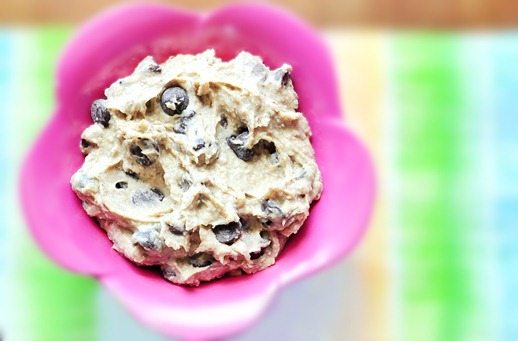
Cookie Dough Dip

( From Chocolate Covered Katie. The pic, too )

You guys.

What we have here, is a game changer.

A healthy cookie dough dip that REALLY tastes like cookie dough.

  • 1 1/2 cups chickpeas (1 can, drained) (250g)
  • 1/8 tsp plus 1/16 tsp salt (maybe a TINY bit more? MAYBE 1/4 tsp?)
  • tiny bit over 1/8 tsp baking soda
  • 2 tsp pure vanilla extract
  • 1/4 cup nut butter (You can get away with using only 3 T. If you use peanut butter, it’ll have a very-slight “pb cookie dough” taste, so if you don’t want this, you can sub oil.)(I used almond oil)
  • up to 1/4 cup milk of choice (Start with 1 T, and add more as needed) (I used 1/4 cup almond milk)
  • Sweetener (see note below, for amount) (her note says that she used 2/3 cup of brown sugar, so I followed suit)
  • 1/3 cup chocolate chips (I used 1/2 cup. Let's be honest.)
  • 2 to 3 T oats (or flaxmeal) (You can omit, but also omit the milk if you do) (I used the flax seed, 2 T)
Add all ingredients (except for chocolate chips) to a food processor, and blend until very smooth. Then mix in the chocolate chips.

Nic and I gobbled this up. It was....surprisingly spot on. I mean, it probably wouldn't win a side by side comparison with real cookie dough, but it was pretty damn close. Nic nailed it when she said that it needed to be a little thicker. Sticking it in the fridge for a bit might have thickened it up. We had no such will power to wait.

We used pretzels and wafer cookies as vessels to shove this in our faces. It was REALLY good. There is a decent amount of sugar in it, but not too bad. And garbanzo beans?! Are you kidding me? Brills! Chocolate Covered Katie has a snickerdoodle version, too...will probably need to check that out immediately.

Edit: LeGreg's mom brought this to a work potluck. Everyone gobbled it up and refused to believe her when she finally told them what was in it. They made her show them the recipe. Also, Nic brought this to her moms house. Her stepbrothers who, I'm not even slightly joking, eat almost NOTHING except cheese pizza, went to town on this. I don't think she ever told them what was in it. Why ruin a good thing, right?

Saturday, December 17, 2011

Party Bark

AKA cake batter chocolate bark.

The chick at How Sweet It Is makes me get fat just LOOKING at her posts. They always look SO amazing. I saw this one and immediately thought "OMG PARTY BARK!!!". The colors just screamed "I'm a good time". Mine didn't turn out quite as pretty as her did. Prooooobably because I sorta ignored that whole "high quality chocolate" part and just got some white and dark chips from Trader Joes. I figured I'd get the cheapy stuff my first go round in case I totally biffed. Which is never unexpected. Judging by her pics, the higher quality stuff is a) thinner when melted and b) the white chocolate is WHITE. Meh. Whatevs. Next time.

Cake Batter Chocolate Bark
6 ounces high quality dark chocolate (she used Lindt 70%)

12 ounces high quality white chocolate (she used Lindt)

3 teaspoons yellow cake mix (I used white. Couldnt remember what kind I was supposed to get! I bet the confetti cake mix would be pretty fun, too)

sprinkles of your choice (at least 3 tablespoons worth or more) (the grocery store had pretty crap selection for me! I'll be on the hunt for more fun stuff...)

Melt dark chocolate either in the microwave or a double boiler. Line a baking sheet with parchment paper and pour chocolate on. You can smooth it with a spatula to the thickness you desire. Stick in the freeze for 20 minutes.

Melt while chocolate. Whisk in cake mix slowly, stirring well until no lumps remain. Let it set for 3 full minutes (or at least until it slightly thickens). Remove baking sheet with chocolate from the freezer and immediately pour white chocolate on top. Sprinkle on sprinkles. Freeze for 20 minutes.


Once set, break into chunks. Keep refrigerated.

While mine won't be winning any style awards just yet, this was about as simple as it gets! There were some neon dinosaur sprinkles in my little variety pack that I'm pretty stoked to try out next. I love the endless possibilities for decorating against a "white" background. 

Wednesday, November 30, 2011

Oreo Stuffed Chocolate Chip Cookies

I can't BELIEVE I never blogged about these. (Picture from the linked Becky Bakes blog!).

Should you ever need a "stop everyone in their tracks and instantly become the belle of the ball" treat to bring somewhere, these are your guys.

Holy crap.

Words can hardly explain.

Oreo Stuffed Chocolate Chip Cookies

recipe from the fantabulous Jenny of Picky Palate

2 sticks (1 cup) softened butter
3/4 cup packed light brown sugar
1 cup granulated sugar
2 large eggs
1 tablespoon pure vanilla
3 1/2 cups flour
1 teaspoon salt
1 teaspoon baking soda
10 oz bag chocolate chips
1 pkg. Oreo cookies

Preheat oven to 350 degrees.  Cream butter and sugars together with a mixer until well combined.  Beat in eggs and vanilla.

In a separate bowl mix the flour, salt and baking soda.  Slowly add to wet ingredients along with chocolate chips until just combined.  Using a cookie scoop take one scoop of cookie dough and place on top of an Oreo Cookie.  Take another scoop of dough and place on bottom of Oreo cookie (not that I was even using a scoop, but I smooshed a small ball flat in my hand, sat an oreo on it, put another smooshed cookie dough and sealed up the edges. If you use too much cookie dough, they turn out MONSTROUS) .  Seal edges together by pressing and cupping in hand until Oreo cookie is enclosed with dough.  Place onto a parchment or silpat lined baking sheet and bake cookies 9-13 minutes or until golden brown. Let cool for 5 minutes before transferring to cooling rack.

Makes about 2 dozen VERY LARGE cookies.

GAH! So amazing.

Becky also has a recipe for Nutter Butter stuffed chocolate cookies, but I haven't tried them  yet. I'm worried that once I do I will never eat anything else in my entire life.

Saturday, October 29, 2011

Pumpkin Fluff

Nicole found this recipe here. That guy found the recipe at allrecipes.com . I love that site.

She sent an email to me with the title: will your guts please approve a nearly plastic dairy-like substance?!?

Stupid lactose intolerance.

I said, "bring it".

Ingredients

  • 1 (16 ounce) container frozen whipped topping, thawed
  • 1 (5 ounce) package instant vanilla pudding mix
  • 1 (15 ounce) can solid pack pumpkin
  • 1 teaspoon pumpkin pie spice

Directions

  1. In a large bowl, mix together instant vanilla pudding mix, pumpkin and pumpkin pie spice. Fold in the thawed frozen whipped topping. Chill in the refrigerator until serving. 

This took her approximately 35 secs to make. Served with cinnamon (maybe hers were regular....can't remember) graham crackers as the dipping mechanism, this was REALLY good. Really really good. Four of us had our faces about 2 inches from that bowl, shoveling bite after bite in, for a solid 15 mins.

SUCK. SESS.

Tuesday, October 25, 2011

Pumpkin Pie Chia Pudding (Parfait)

(The original recipe is for a parfait, but I can't be trusted with cookies or other topping-like things in my house).


The linked blog, Oh She Glows, adds chia seeds to all kinds of smoothies and puddings and stuff. I didn't really think much of it, assuming it was the new acai trendy superfood or something. 


But then chia seeds were mentioned in the rad book I'm reading and they're the secret wonderfood of the ancient runners or whatever. Even after having used it a bit, I'm not convinced that I'm a better human being because of it, but who knows! Maybe I don't use it often or consistently enough.


Enter two things I'm interested in right now: pumpkin and chia.

Pumpkin Pie Chia Pudding

A healthier alternative to a delicious pumpkin pie filling! Feel free to play around with the ingredients to suit your taste buds. (her notes, not mine)

Yield: 2 servings or 1 & 3/4 cups
Ingredients:
  • 3/4-1 cup unsweetened almond milk
  • 1 cup canned pumpkin, chilled if possible
  • 2 tbsp chia seeds
  • 2 tbsp vanilla protein powder, optional
  • 1/2 tsp cinnamon, or more to taste
  • 1/4 tsp ground ginger
  • pinch of nutmeg
  • 1-2 tbsp maple syrup, to taste (I have pumpkin syrup, so I use that instead)

1. In a medium-sized bowl, whisk together all ingredients until combined and no clumpy bits remain.
2. Place bowl in the fridge for 1-2 hours or overnight, to thicken and chill.
3. Serve with raisins, walnuts, or crushed ginger cookies if desired.

So, chia seeds swell up, kind of like tapioca, when they're in liquid. Put too much in, they get slimy. I follow this recipe pretty closely (no protein powder because I don't have any, sub pumpkin pie spice for ginger & nutmeg, no toppings), and find the texture just fine. It's only a little sweet, a lot healthy, SUPER pumpkin-y, and seriously takes about 45 secs to whip together. I've had it as my afternoon "sweet" snack at work almost every day. Lovin it. 

Thursday, September 9, 2010

Baked Pears


The land on my boyfriends (aka his parents) property has TONS of fruit trees on it. In season right now? Pears. His mom seems to think that I eat nothing but, so I'm always sent home with a big plastic bag FULL of them. His dad mentioned, this last weekend, that I should try baking them. Hmmm...I'M GAME!! Sounds SO good, right?

Ingredients

  • 2 medium ripe pears, peeled and halved (I didn't peel them. I don't peel anything, pretty much. Peels usually have a lot of fiber)
  • 4 teaspoons butter or margarine
  • 1 teaspoon lemon juice
  • 2 teaspoons sugar
  • 1/4 teaspoon ground cinnamon
  • 4 teaspoons orange marmalade (meh. skipped it. The comments said that other jams were good, but I only have grape right now, and that didn't sound great)

Directions

  1. Place pear halves, cut side up, in a shallow 1-qt. baking dish (I put little foil place holder things under the skinny half of the pear, so that it wouldnt tip down. We cant be surrendering any butter by having it drip off the end, now can we?!). Place butter in the center of each; drizzle with lemon juice. Combine sugar and cinnamon; sprinkle over pears. Top with marmalade. Cover and bake at 350 degrees F for 15-20 minutes or until heated through (eh...I cooked mine for almost an hour).

Omg the SMELL. It smelled SO good!!I ate these with vanilla ice cream on top. Pre-ice cream, it's actually a pretty healthy dessert. I'll totally be making it again. Like, tomorrow.

Monday, December 15, 2008

Pumpkin Smoothie

Fargo came over and we attempted to recreate the Pumpkin Smash smoothie that Jamba Juice used to have...SUCCESS. It was so freakin perfect! And totally easy:

1 cup soymilk
1/2 cup canned pumpkin pie mix with spices
2 cups vanilla frozen yogurt
1 cup ice

Thursday, December 11, 2008

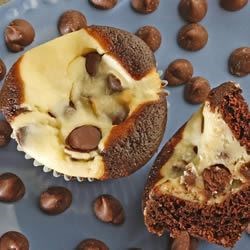
Black Bottom Cupcakes


One of my friends is obsessed with cupcakes and I decided that I needed some in my life. I hopped on my favorite recipe website, AllRecipes, and got to searching. These little delights popped up and I knew they were the ones. Whole Foods used to (or maybe still does) have a version of these and they were heavenly, so I figured I'd give them a try.


Ingredients:

1 (8oz) package of cream cheese (I'll try light next time, since regular cream cheese was pretty stiff)
1 egg
1/3 cup white sugar
1/8 teas salt
1 cup semisweet chocolate chips

1.5 cups flour
1 cup white sugar
1/4 cup of cocoa (I used 1/3, which several reviewers suggested)
1 teas baking soda
1/2 teas salt
1 cup water
1/3 cup vegetable oil
1 tablespoon white vinegar (pretty sure I grabbed the first non-apple vinegar that I found in the pantry. worked well enough)
1 teas vanilla extract

Directions
1. Preheat oven to 350, lightly butter muffin tins

2. Beat together cream cheese, egg, sugar, salt. Stir in chocolate chips, set aside (I mixed, rather than 'beat', which is probably why the cream cheese was all lumpy for mine. Looked kinda gross, but still tasted awesome when they were done)

3. In a separate bowl, sift together flour, sugar, cocoa, baking soda, and salt (sift, to me, means run a fork through it a few times to break up the big lumps. I'm way too lazy to actually sift). Add the water, oil, vinegar, and vanilla. Beat until well combined (surprisingly fast and easy). Batter will be thin.

4. Fill muffin cups 1/3 full with the chocolate batter. Top each one with a spoonful of cream cheese mixture.

5. Bake for 20-25 mins (the actual recipe says 30-35, but several of the reviews said that that was too much. I always check the reviews for modifications and tips on that website)

6. Eat approximately 5 in a 3 minute span with a huge glass of milk, because these are the SHIT, people.

I may or may not have added #6 myself. Still stands true, though. Trust me.